How To Wax A Car Properly By Hand: Pro Tips
Wax evenly, work in shade, and buff gently for a durable, glossy finish.
I’ve waxed hundreds of cars by hand and taught others to do it well. This guide shows exactly how to wax a car properly by hand, step by step. You’ll get pro tips, tool lists, troubleshooting, and simple routines that protect paint and boost shine. Read on for clear, hands-on instructions you can follow today.
Why hand-waxing matters
Hand-waxing keeps paint safe. It adds a sacrificial layer that repels water, dirt, and UV rays. Doing it by hand gives control and lets you target thin spots and edges without harsh machines.
Hand-waxing can be gentler than machine polishing. It’s a great option for new cars and older cars that only need protection, not paint correction. Learning how to wax a car properly by hand helps you extend paint life and make the car look newer.

Tools and materials you need
Choose quality supplies. Cheap wax or rough cloths can scratch paint. Here’s a checklist to get started:
- Car shampoo with pH-neutral formula for safe cleaning.
- Microfiber wash mitt to avoid swirl marks.
- Two buckets with grit guards to prevent recontamination.
- Clay bar or clay mitt to remove bonded contaminants.
- Soft microfiber towels for drying and buffing.
- Foam or microfiber applicator pads for wax application.
- Carnauba or synthetic wax suited to your needs.
- Isopropyl alcohol (diluted) or panel cleaner for final wipe.
- Shade or a cool working area to avoid streaking.
Having the right tools makes learning how to wax a car properly by hand faster and safer.
Preparation: wash, clay, and inspect
Proper prep is half the job. Skip steps and the wax won’t bond or look right.
- Wash the car thoroughly with the two-bucket method. Use gentle soap and rinse well.
- Dry with clean microfiber towels. Pat rather than drag to avoid swirls.
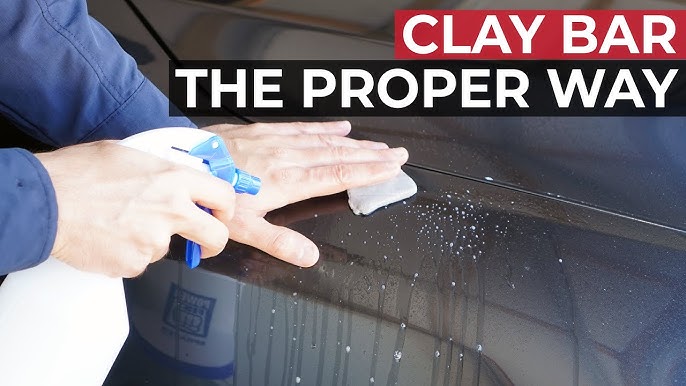
- Clay the surface to remove industrial fallout, rail dust, and tar. Work panel by panel.
- Inspect under good light for scratches, tar, tree sap, or water spots.
- If paint has heavy defects, consider paint correction before waxing. Wax protects; it doesn’t fix deep scratches.
Preparation determines how long the protection lasts. Learning how to wax a car properly by hand always starts with clean paint.

Step-by-step: how to wax a car properly by hand
Follow a consistent method. Work in small sections. Keep motions light and even.
- Read the wax instructions. Different products cure at different speeds.
- Work in shade and on cool paint. Direct sun makes wax dry too fast.
- Put a small amount of wax on the applicator pad. A little goes a long way.
- Apply wax to a 2×2 foot section with overlapping circular or straight passes. Use light pressure.
- Allow the wax to haze per the product directions (usually 5–10 minutes). Don’t over-wait; residue can harden.
- Use a clean, plush microfiber towel to buff off residue. Flip the towel often.
- Check your work in bright light. Re-wax missed spots or edges as needed.
- Move to the next section and repeat until the whole car is done.
Practice makes the process smooth. Doing the same routine helps you master how to wax a car properly by hand.

Buffing and finishing touches
Buffing brings out the shine. Use technique, not force.
- Use clean microfiber towels. Change towels before they get saturated.
- Buff with light, circular motions, then finish with straight strokes for uniform sheen.
- Pay special attention to panels that catch light. Look from different angles.
- Seal seams and door jambs last. These areas trap wax and dirt if rushed.
- If residue is stubborn, use a small amount of isopropyl alcohol on a microfiber to remove it, then re-buff.
A careful buff makes the difference between good and great. This is the final step in how to wax a car properly by hand.

Tips for different paint types and conditions
Paint reacts differently. Adjust your approach.
- Clear coat modern paint: Use gentle synthetic or carnauba wax. Shorter cure times help prevent streaks.
- Single-stage paint: Test in a small area first; some waxes can alter appearance. Use mild products.
- Matte or satin finishes: Avoid traditional waxes. Use products made for matte paint to maintain texture.
- Very hot or cold weather: Work in a garage or shade. Extreme temps change curing times and ease of removal.
- Older, porous paint: Consider a sealant after cleaning. Wax alone may soak in and look dull.
Choosing the right product helps you learn how to wax a car properly by hand without surprises.
Common mistakes and troubleshooting
Avoid these common errors to get the best results.
- Using too much wax. Over-application causes streaks and wasted product.
- Working in sun or on hot panels. Wax cures unevenly and is hard to remove.
- Dirty towels or pads. They scratch and spread grime.
- Skipping clay or prep. Wax won’t bond to contaminated paint.
- Rubbing hard. Pressure can create micro-scratches.
PAA-style questions:
How long should I wait between wax coats?
Wait at least the recommended cure time on the label. For most products, a single good coat is best; multiple coats can be layered after the first cures.
Can I wax over sealant?
Yes. Wax over sealant can improve depth and shine, but allow the sealant to cure fully first, usually 24–48 hours.
What if wax dries into white residue?
Use a fresh microfiber dampened with a small amount of panel cleaner or isopropyl alcohol to remove residue, then re-buff dry.

How often to wax and maintenance schedule
Frequency depends on product and conditions.
- Synthetic sealants: Last 4–6 months. Wax over them for extra depth.
- Carnauba wax: Typically 4–8 weeks of strong protection. Reapply more often in severe climates.
- Light maintenance: Use a spray detailer after washing to top up protection between waxes.
- Heavy use: If you park outside or drive daily, check shine monthly and re-wax as needed.
A simple routine helps you maintain protection and keeps your car looking great. Knowing how to wax a car properly by hand includes a realistic maintenance plan.
Personal experience and final best tips
From my hands-on work, small habits make big differences.
- Tip 1: Use small amounts of wax. I learned this after wasting jars and getting streaks. Less product, more control.
- Tip 2: Flip towels early. Dirty sides make swirls fast. I keep a stack of clean towels ready.
- Tip 3: Practice on a hidden panel. I once tried a new wax on a door and corrected streaks later. Testing saves time.
- Tip 4: Keep a notebook of products and cure times. Over years, I build a simple cheat sheet for each wax.
These small routines helped me master how to wax a car properly by hand and will help you too.
Frequently Asked Questions of How to wax a car properly by hand
How long does hand wax last on a car?
A typical carnauba wax lasts 4–8 weeks. Synthetic waxes or sealants can last several months. Weather and storage conditions change longevity.
Can I wax a car after washing immediately?
Yes, once the car is fully dry and free of contaminants. Use a clay bar if needed before waxing to ensure proper bonding.
Is hand waxing better than machine waxing?
Hand waxing is gentler and offers more control. Machine waxing or polishing can speed the job but risks burns or swirl marks when done incorrectly.
Will wax hide scratches?
Wax hides very light scratches and improves appearance, but it does not remove deep scratches. Paint correction is needed for real repair.
Can I wax over old wax?
Yes, but clean the surface first. Use a panel wipe or mild solvent to remove residues for even new bonding.
Conclusion
Waxing by hand protects paint and gives a lasting shine when done right. Start with clean paint, use the right tools, and follow a steady routine. Small habits—working in shade, using little product, and buffing properly—make the biggest difference.
Try the step-by-step method here this weekend. Share your results below, subscribe for more car-care guides, or ask a question to get tailored tips.